Fine-Tuning Your PDF Banner for Optimal Display
When uploading a custom banner for your PDF reports in Forensic OSINT, it's important to understand how the image will appear once embedded in the final report. Even if your banner looks great on screen, it might appear oversized or awkwardly scaled in the generated PDF.
This guide walks you through how to format your banner for a professional appearance on every page of your report.
Why Your Banner May Look Too Big
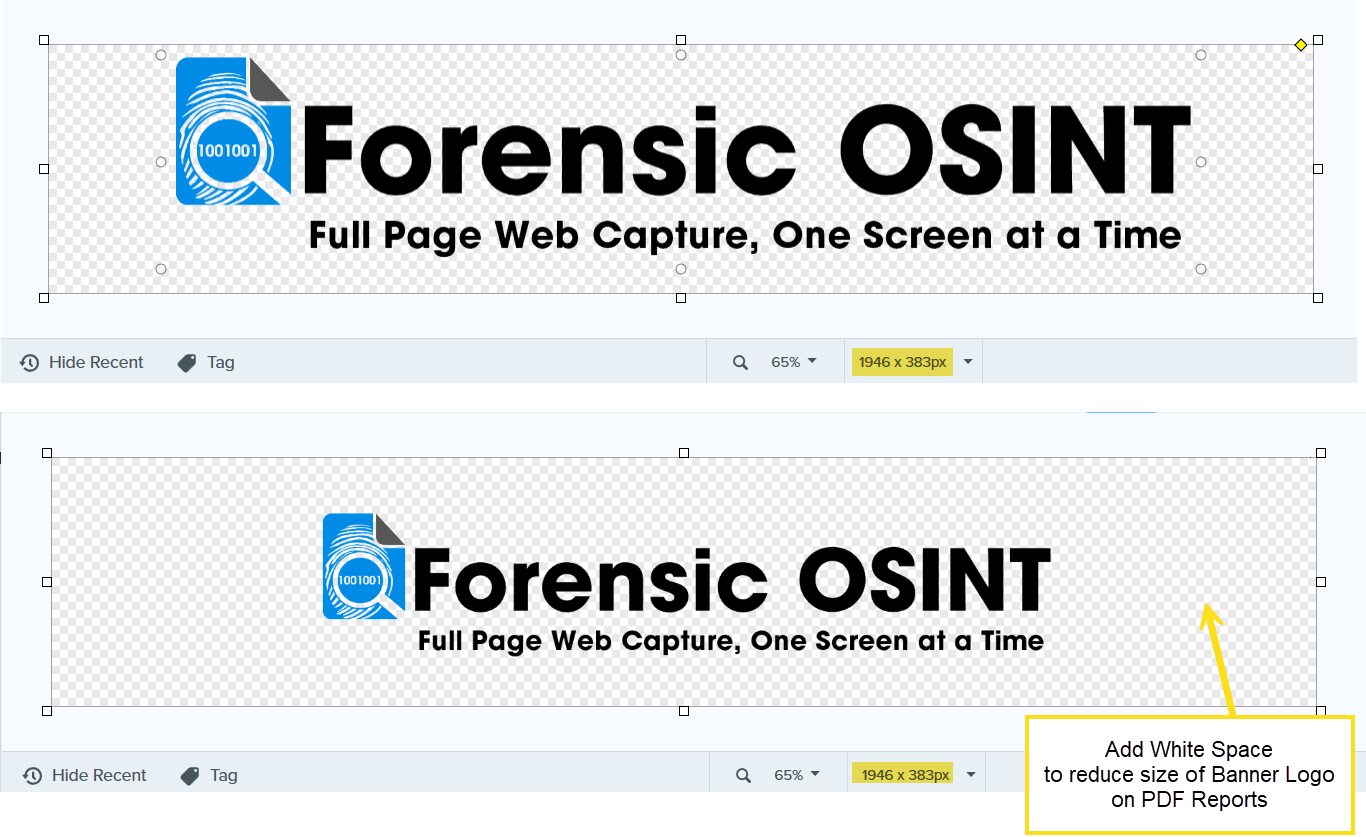
PDF rendering engines preserve the image’s original pixel height. So even if your banner has the correct width, if it has minimal top and bottom padding, it will appear large on the page.
A banner that’s 1946px wide and 383px tall with no padding will fill the top area of the PDF. But if you add white space around the logo inside that canvas, it visually “shrinks” the banner without changing dimensions.
Top Tip: Add vertical white space to reduce the logo’s display size, rather than shrinking the image resolution.
Recommended Banner Size
Width: 1946px
Height: 383px
Format: PNG or JPEG
Background: Transparent or white
File Size: Under 1MB recommended for performance
Before and After Example

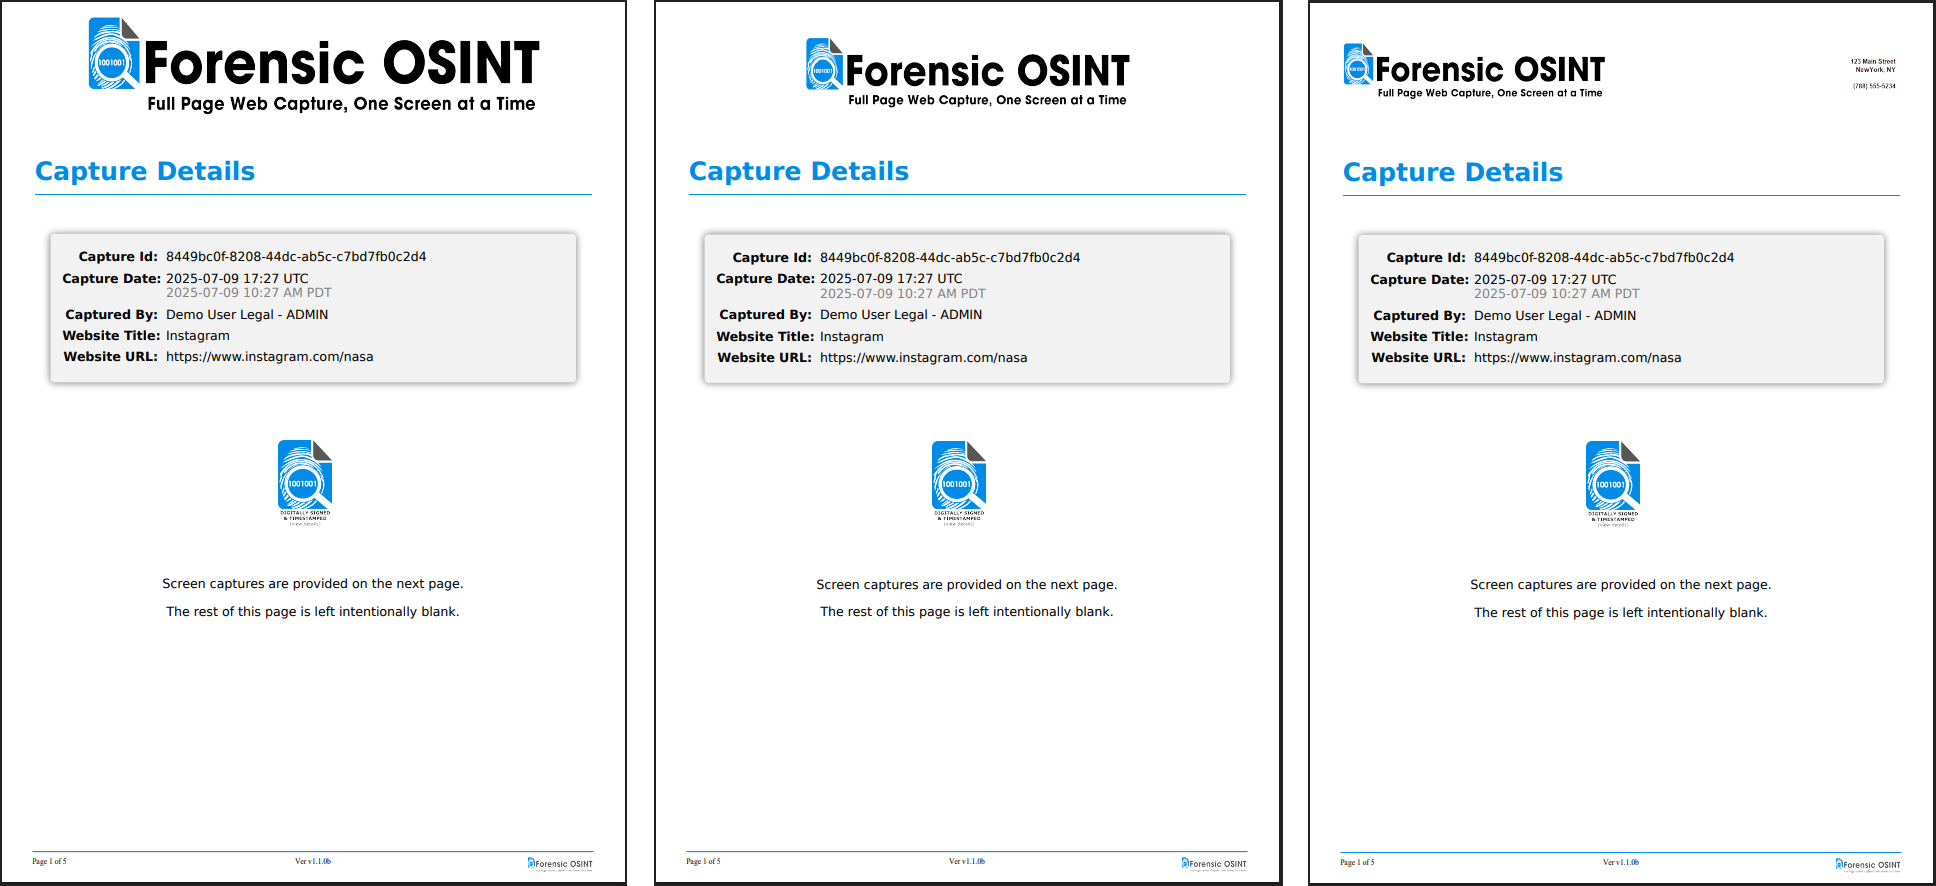
Adding white space reduces the perceived size of the banner without changing dimensions.

Left: No whitespace. Middle: Moderate whitespace. Right: Ideal sizing and alignment in PDF.
How to Add White Space for Free
Here’s how you can adjust your banner using Canva (free account):
1. Visit https://www.canva.com and create a custom design at 1946 x 383 pixels.
2. Upload your logo or original banner.
3. Drag your logo into the center, leaving extra space at the top and bottom.
4. Set the background to white.
5. Click Share > Download > PNG (or JPEG).
6. Upload this new version as your PDF banner in the app.
Uploading Your Banner
To learn how to upload and apply your banner, visit the main Custom Branding article:
How to Add a Custom Banner in PDF Reports
How to Preview Your New Banner
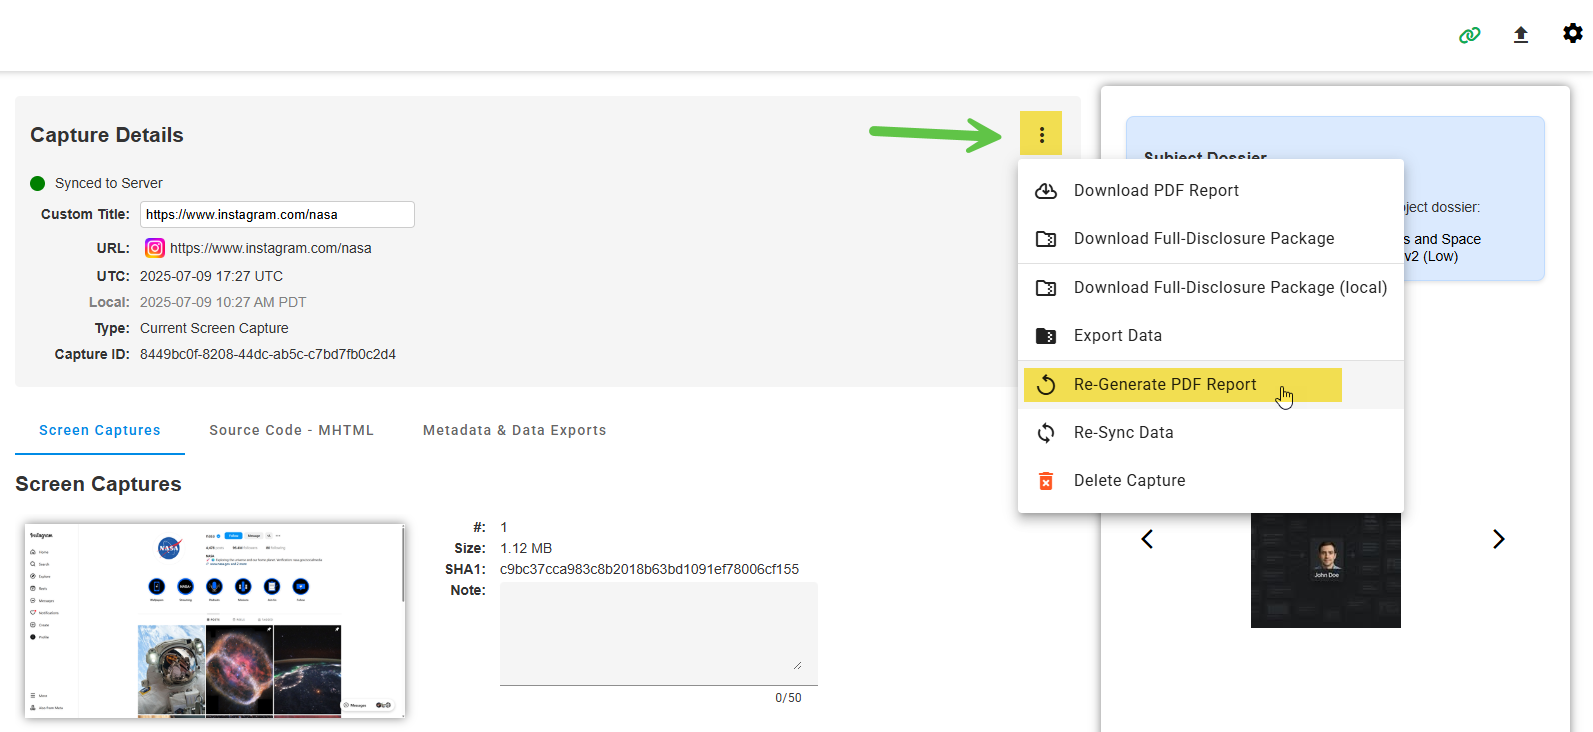
Once you've uploaded a new banner, you can quickly preview how it appears in your PDF reports.
1. Go to any capture in your case.
2. Click the three-dot menu in the top-right of the Capture Details box.
3. Select Re-Generate PDF Report.
4. Open the downloaded PDF and inspect the top banner.

Use the “Re-Generate PDF Report” option to test how your updated banner appears.
If you’re not sure how your banner will look, run a sample capture with the new banner applied and check the first page of the PDF. Tweak the padding as needed.

Minimum Requirements:
- 8 Characters
- 1 Upper
- 1 Lower
- 1 Digit

